1. Describe this demo project in detail to help developers customize their own Ethernet protocol.
2. Describl how to export this project to a Nexus Panel.
Click the System Menu, press Open and then choose "ADE demo_wifi.epgz"
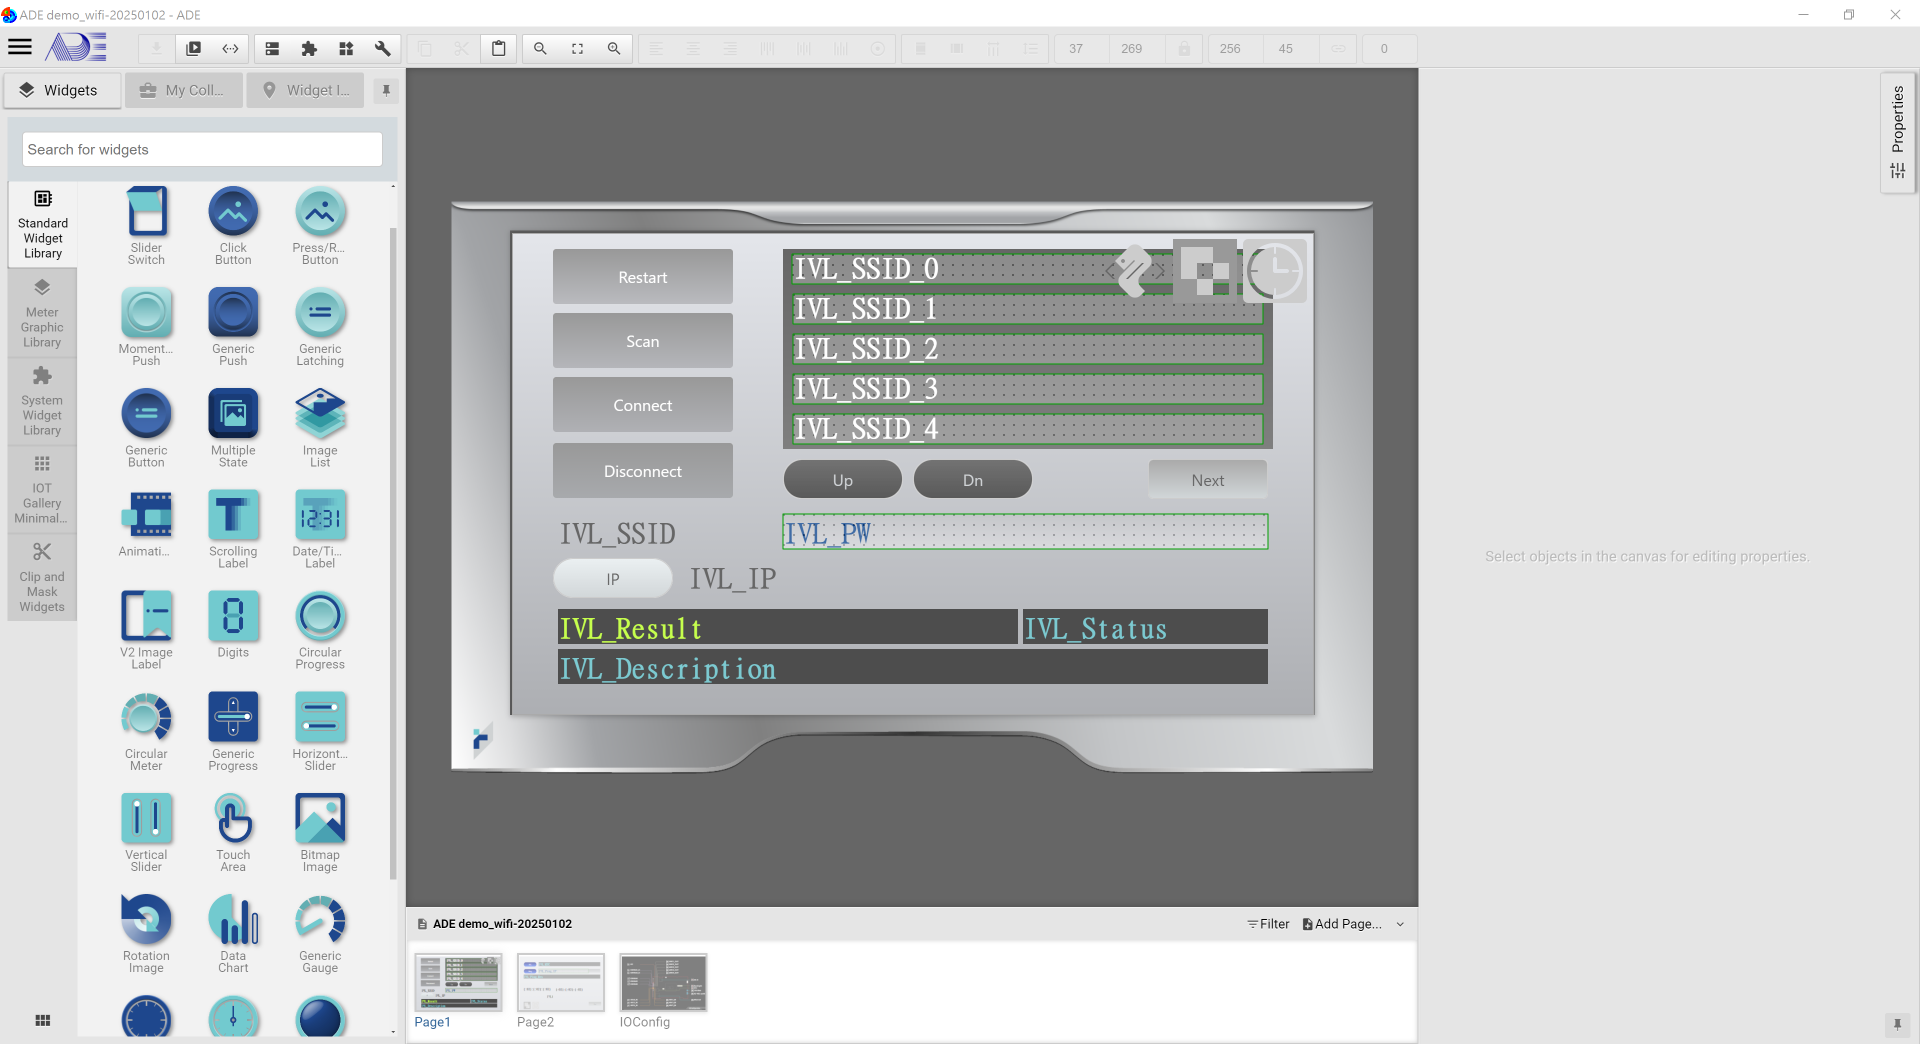
Once the project is successfully loaded, you will see:
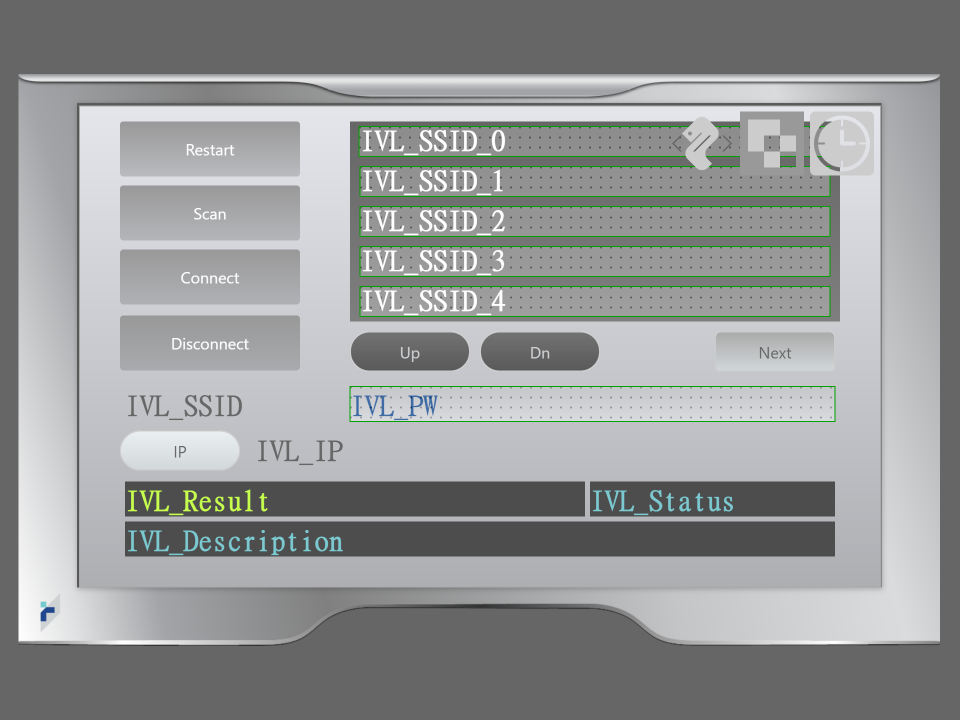
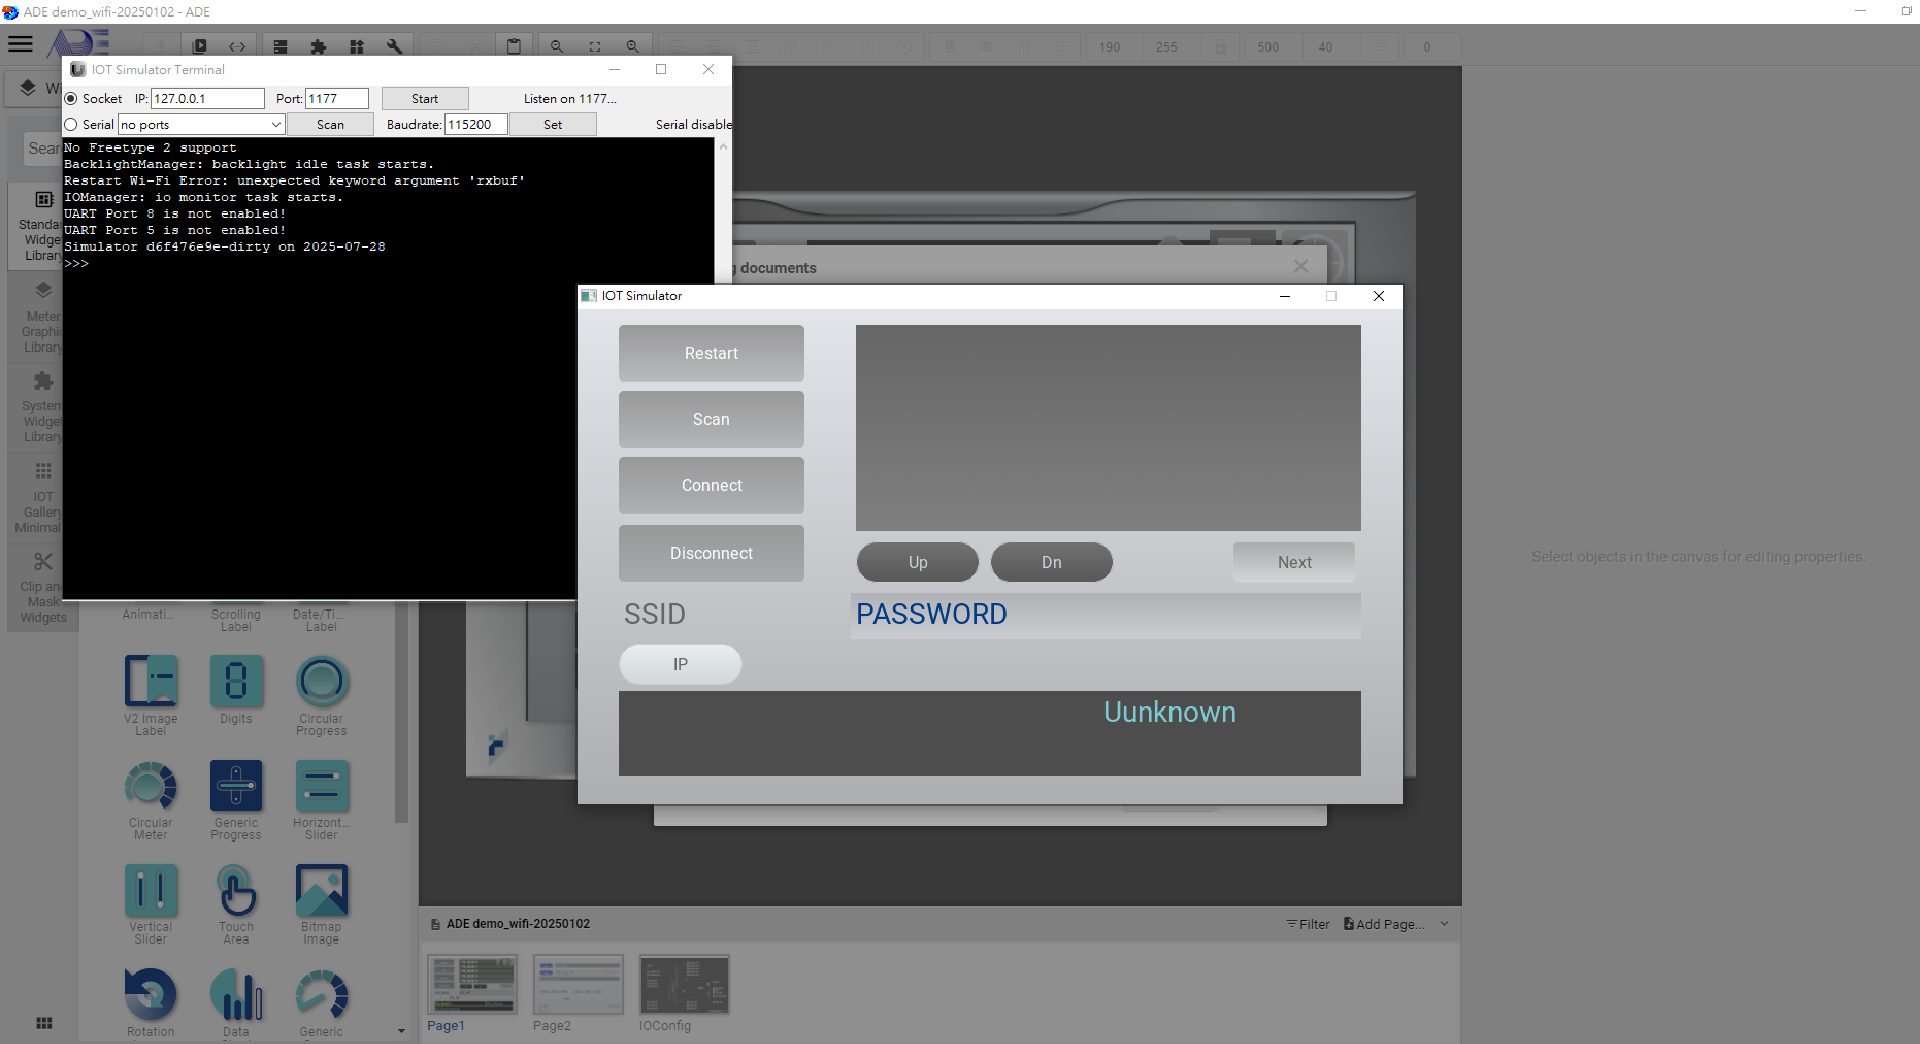
-ITA_SSID_0~4: Touch Area Widget, once clicked, IVL_SSID shows the SSID.
-ITA_PW: Touch Area widget, once clicked, a Popup Input Pad is shown for entering the password.
-INB_Restart: Click to restart the Wi-Fi interface.
-INB_Scan: Click to scan nearby available Wi-Fi networks (SSID).
-INB_Connect: Click to start the Wi-Fi connection.
-INB_Disconnect: Click to disconnect the Wi-Fi connection.
-INB_IP: Cilick to gather IP and MAC addresses.
-INB_Next: Switch to the next page.
-INB_Up: Click to switch to the previous SSID.
-INB_Dn: Click to switch to the next SSID.
-ICO: Define global functions.
-IIP1: Popup Input Pad widget.
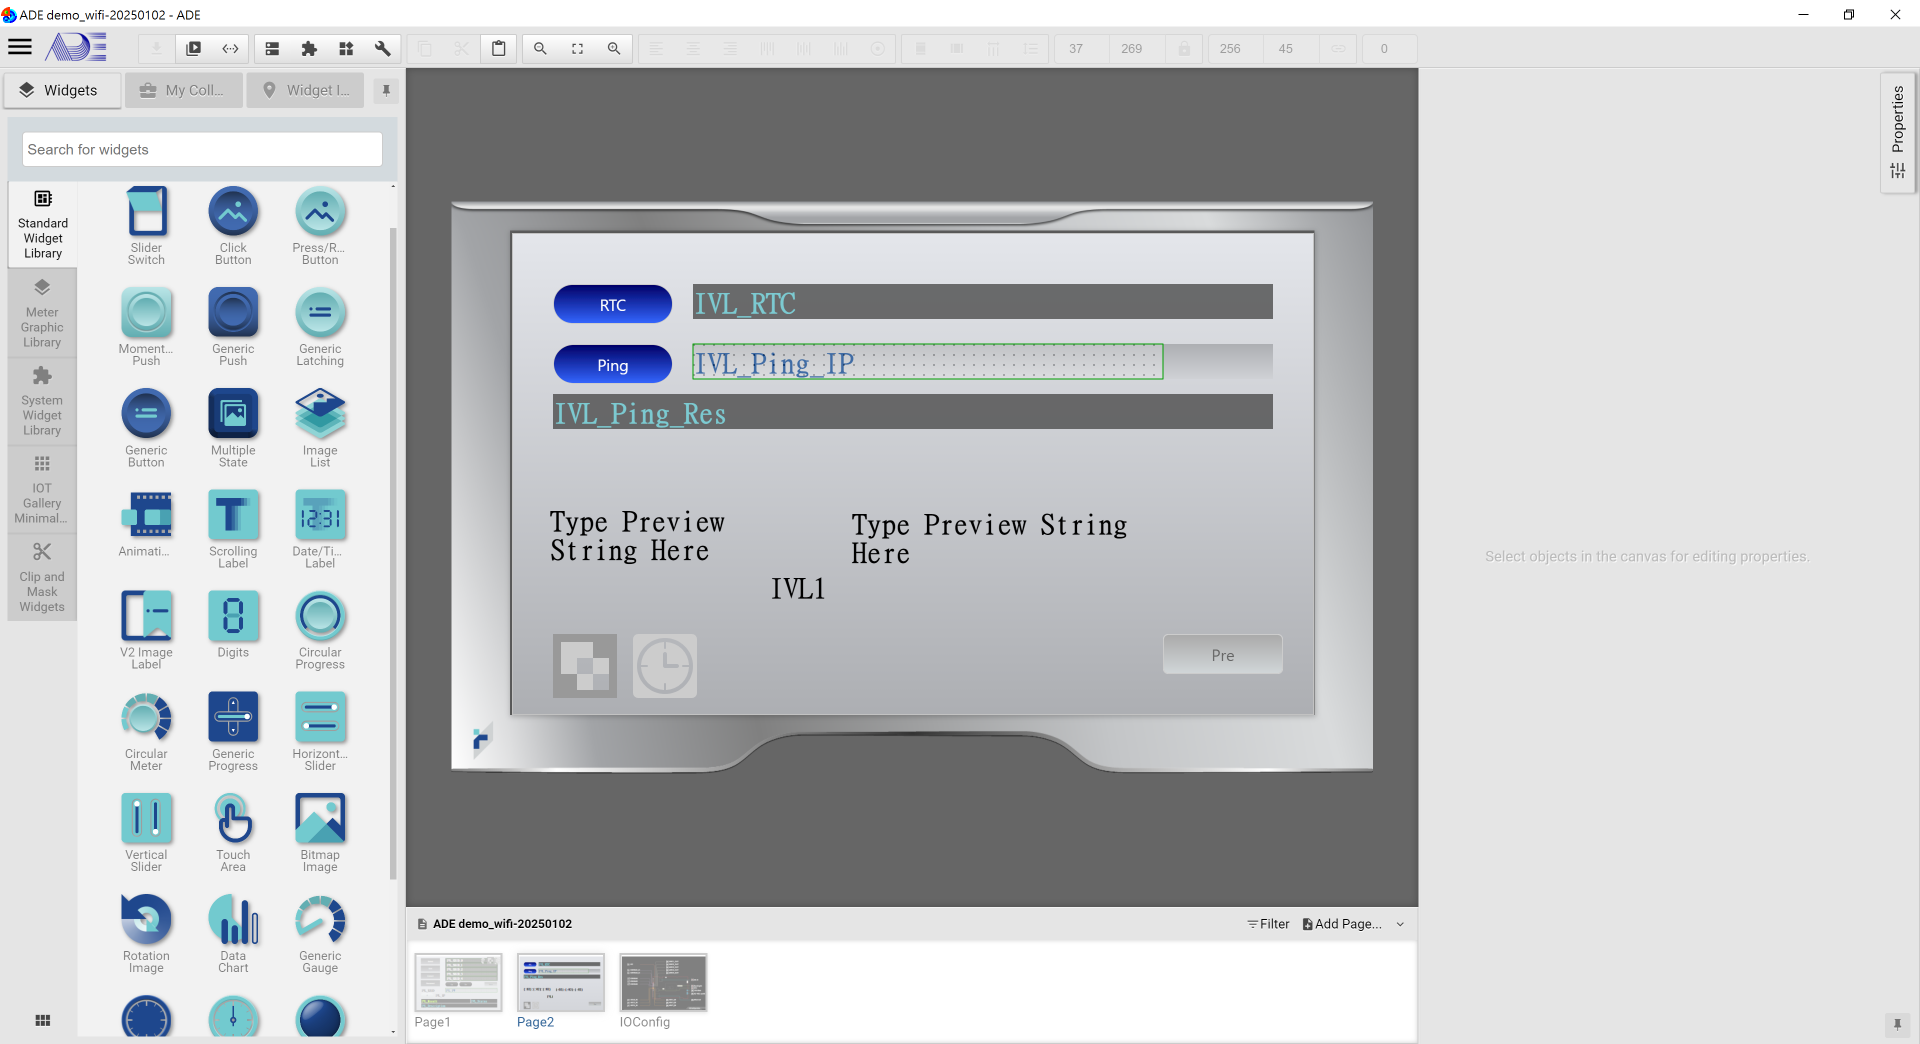
-IT: Set the time and show the current status in INV_Status.
-IVL_SSID_0~4: Display SSID.
-IVL_PW: Show the entered password.
-IVL_Result: Display INB_IP execution status.
-IVL_Status: Display IT time and status.
-IVL_Description: Display INB_Restart, INB_Sacn, INB_Connect, INB_Disconnect, and NB_IP status.
-IVL_IP: Display IP address.
-IVL_Status: Show the current connection status.
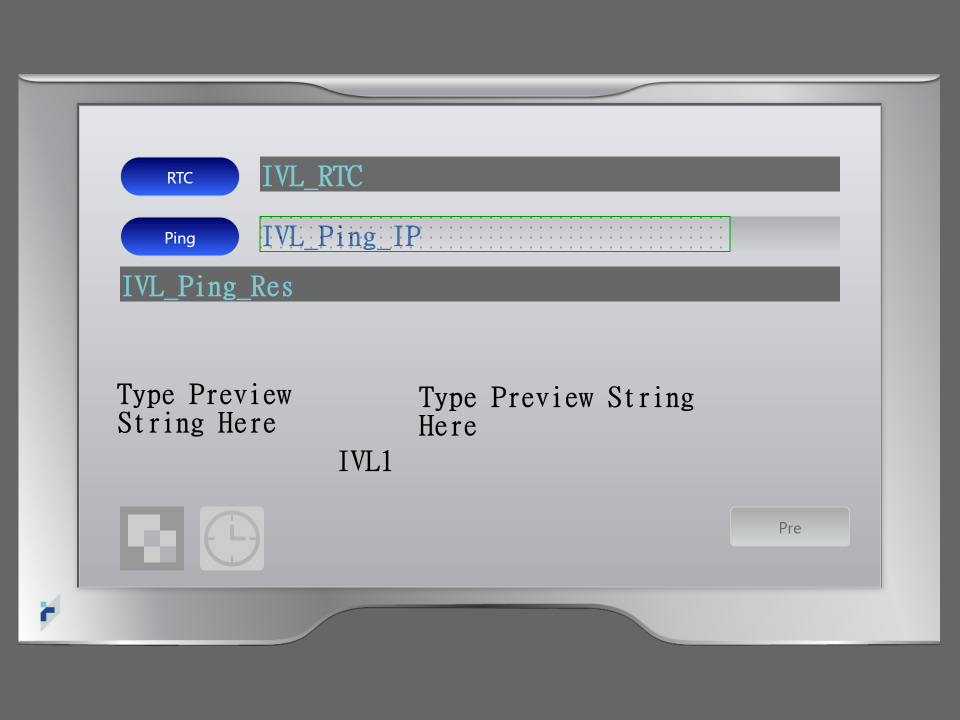
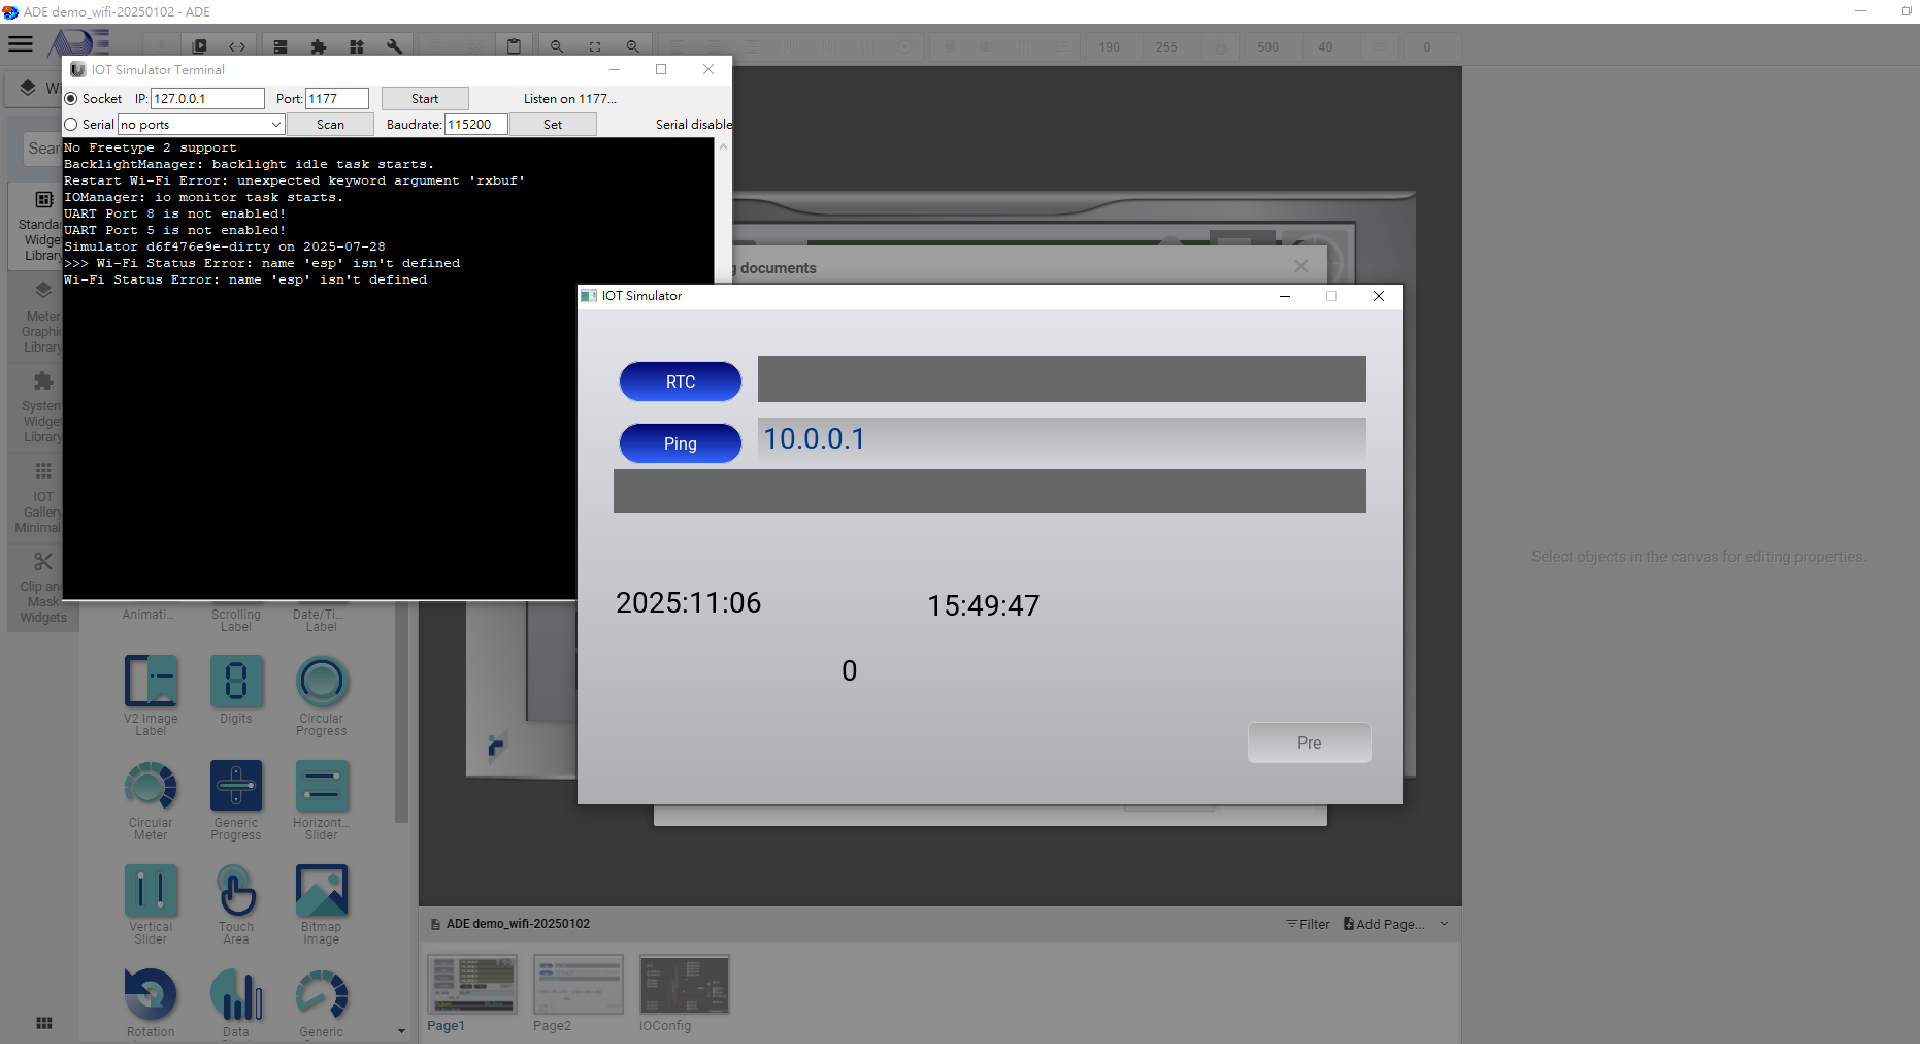
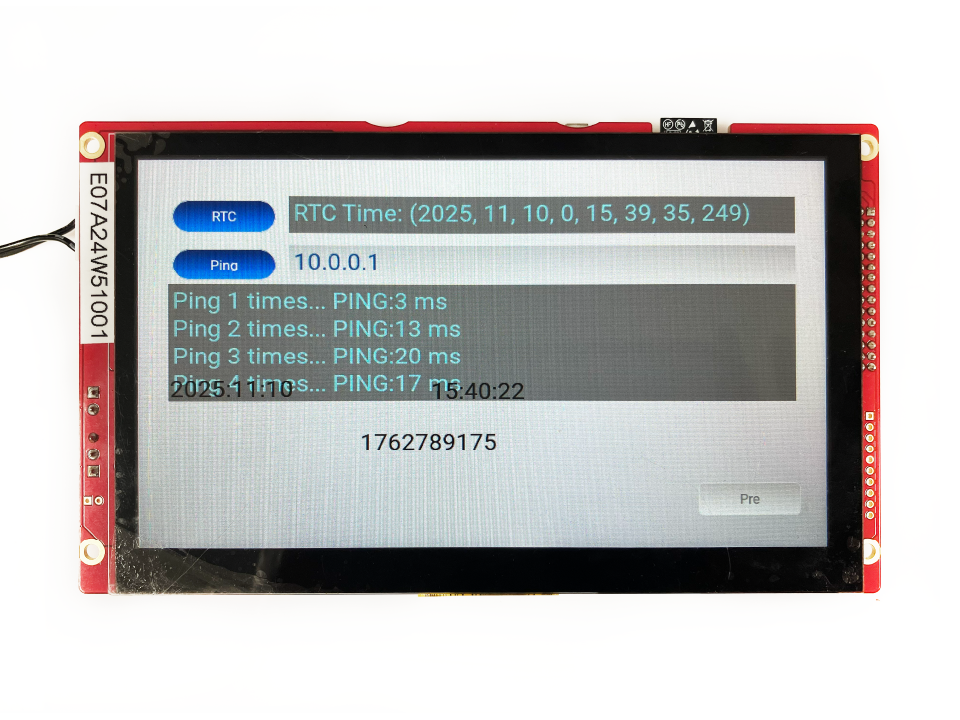
-INB_RTC: Click to trigger an event to gather the current time from the connected Wi-Fi network.
-INB_Ping: Ping.
-INB_Pre: Go back to the previous page.

-IVL_RTC Register: Display rtc time information.
-IVL_Ping_IP Register: Display the IP Address used by Ping.
-IVL_Ping_Res Register: Display Ping results.

-ITA_Ping_IP: Touch Are Widget. Once clicked, a Popup Input Pad is shown for entering the Ping's IP address.
-IIP2: Popup Input Pad widget.
-IT_Ping: Timer to trigger Ping.
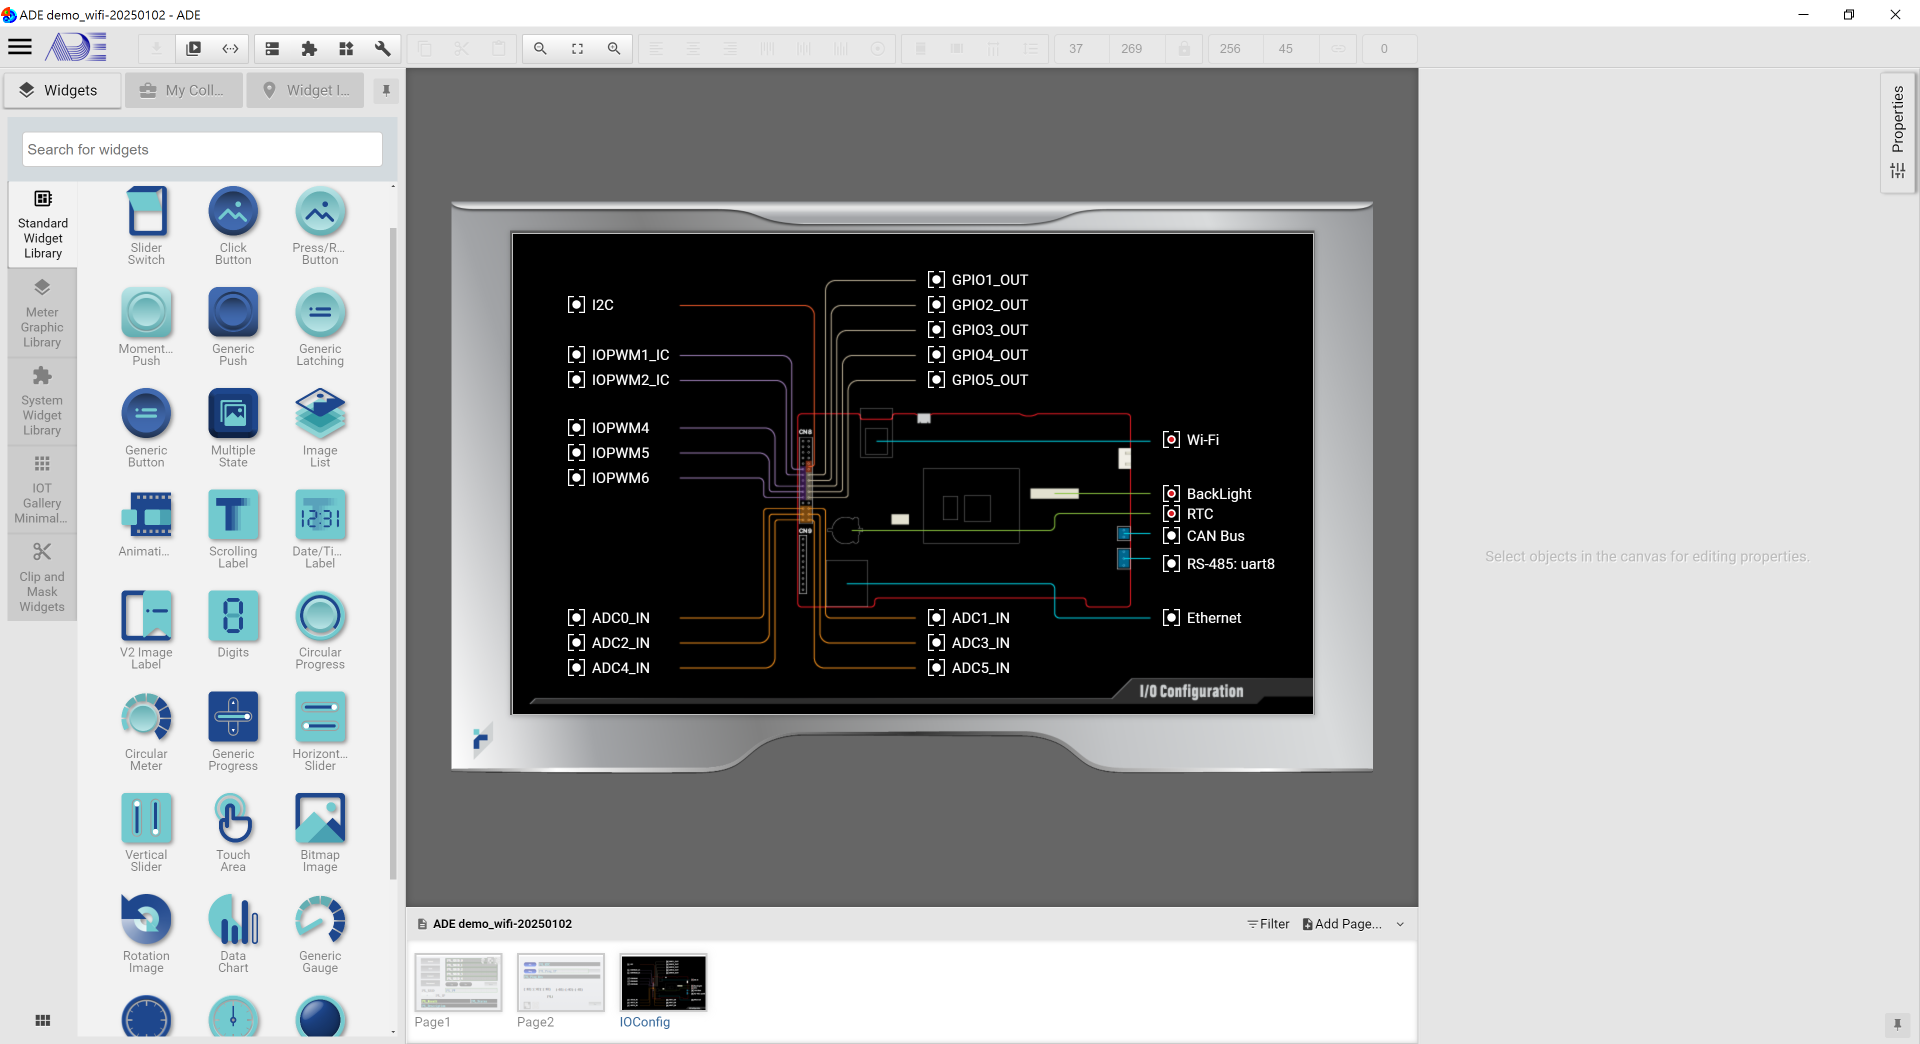
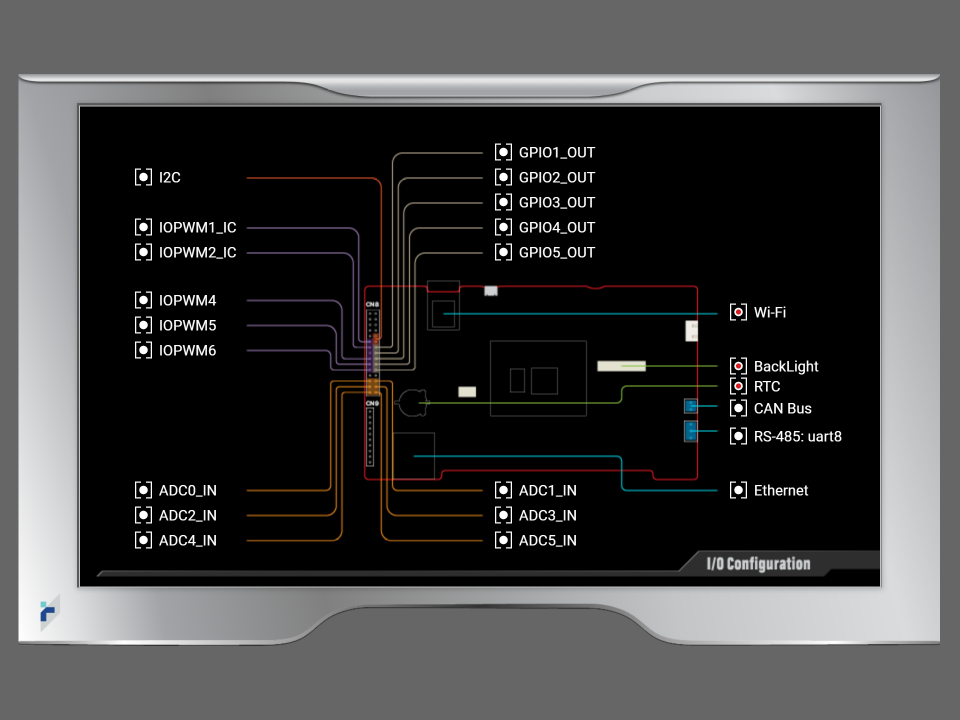
Enable IO:

    -Backlight: The screen is locked after 180 seconds of inactivity.
    -RTC: Set the real time clock.
    -Wi-Fi: The Wi-Fi interface.
       => Imported File
            1. esp8266.py
It is recommended to run the demo project in the built-in simulator before exporting the project to an IOT product.
Click "Launch Simulator" in the "Download" tool bar.
Once the simulator is launched successfully, users will see:
1. Please connect the panel with your PC with a USB cable. Then power on the panel.
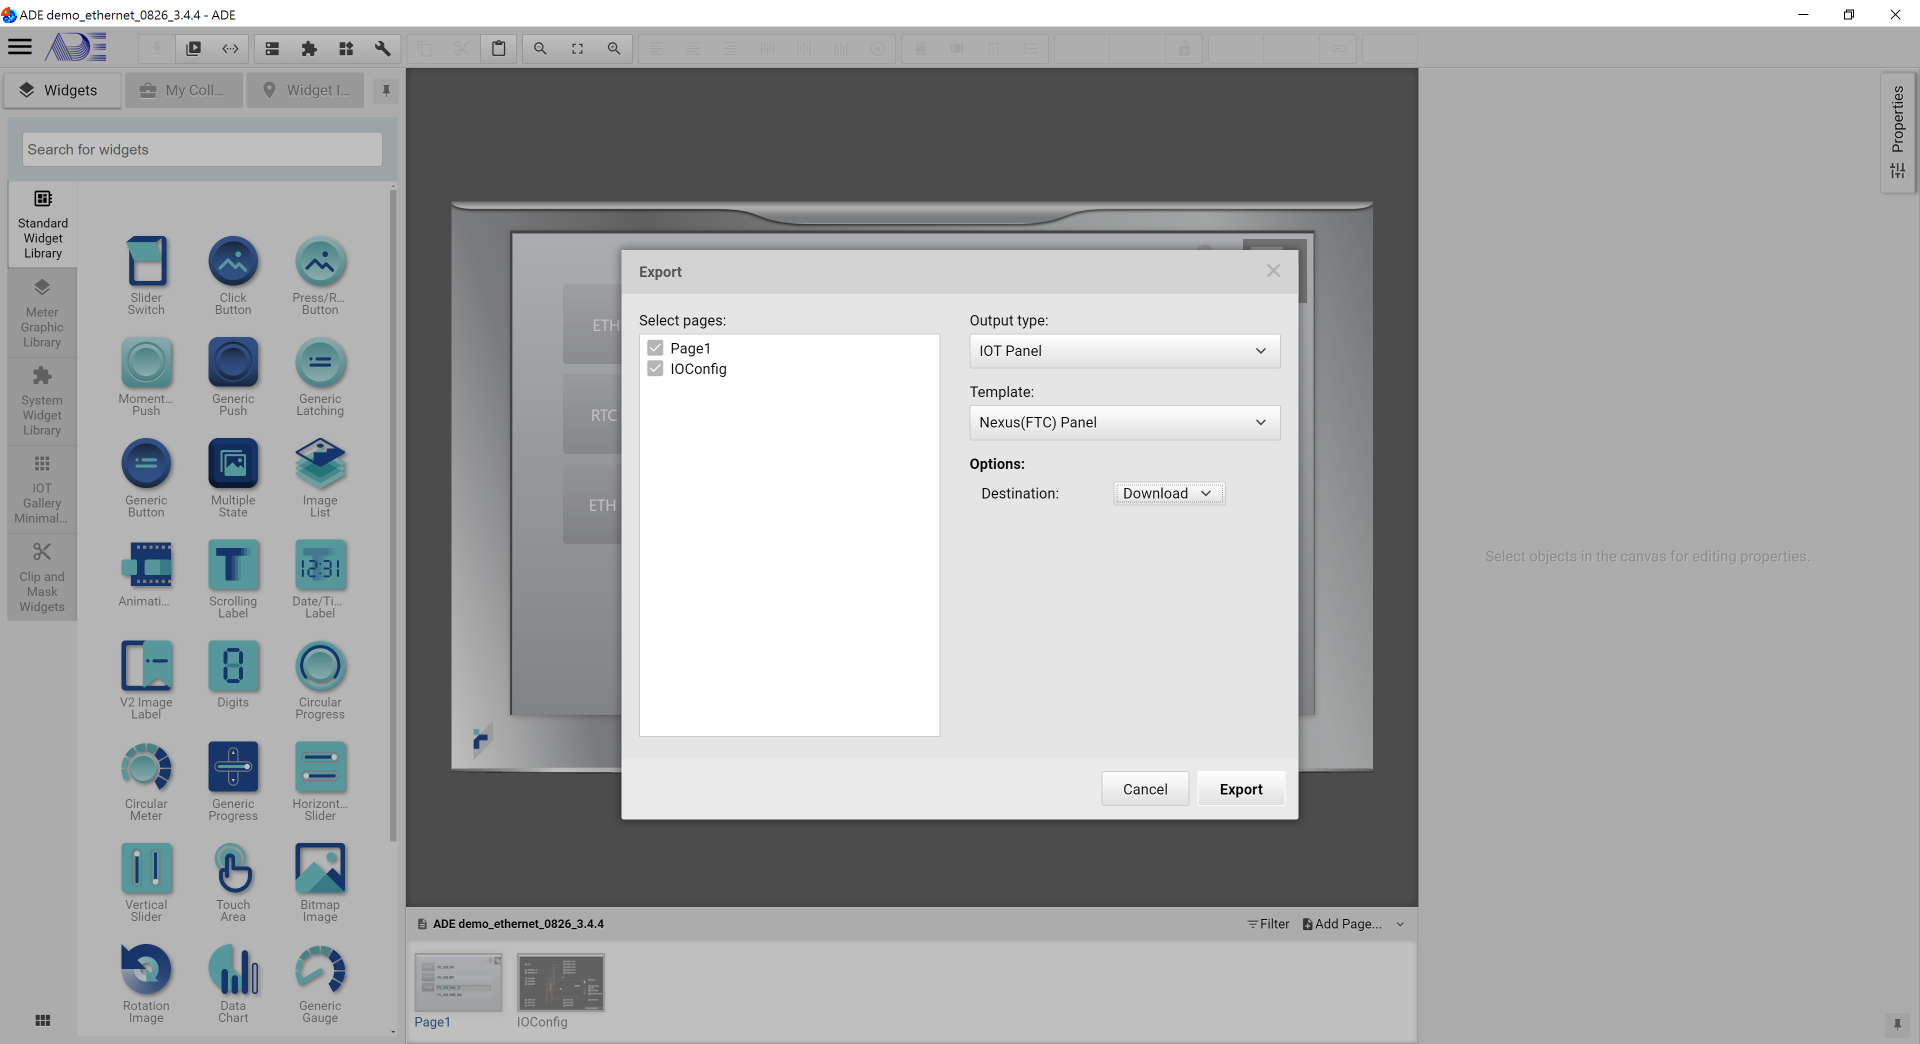
2. In ADE, export the demo project.
3. As shown, in the Export window, please select the Output Type to "IOT Panel", match the template to your target IOT panel and set Options to download. The click Export at the bottom.
1. Once Export is executed successfully, remove the USB cable.
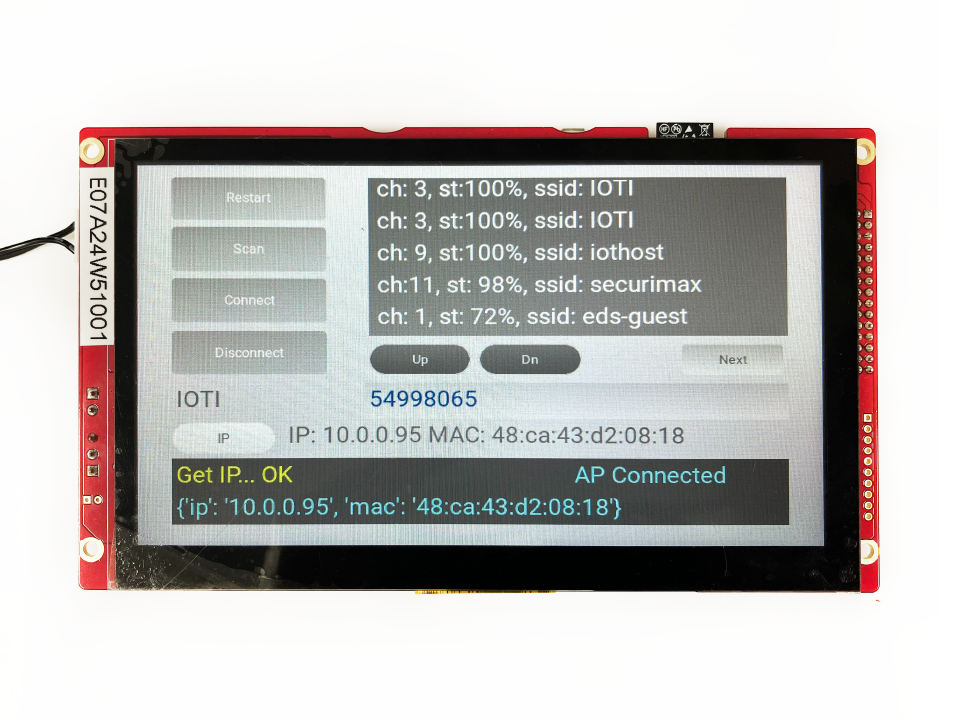
2. After power-on, the Panel starts to scan the available Wi-Fi networks
3. In the first page, available SSIDs are shown, and users can choose one to enter the password. In this demo project, SSID is eds-hsinchu, password is 54998065.
4. Click Connect and once the Wi-Fi network is connected, "AP connected" is shown.
5. Click IP to acquire the IP address and MAC
1. Click RTC to acquire the time information from the Wi-Fi network.
2. Enter Wi-Fi IP (10.0.0.1) and then click Ping.
3. Ping results are shown below.
The demo project is to show how the basic Wi-Fi operations are done. Users can customize their own Wi-Fi communication based on the sample code offered in this project.